Video conferencing and online learning just got more interesting! You’ve already used Webex for remote meetings, but now you can connect it directly to Prezi Video and share your content, ideas, and yourself, all together on the same screen.
1. Start the Prezi Video desktop app and open the Webex / Webex Meetings desktop or web app.
2. In the Prezi Video desktop app, there are multiple different ways to present your content. You can either:
- Import a PowerPoint file and convert it for presenting live in a video call
- Import a Google Slides presentation and convert it for presenting live in a video call
- Import a Prezi presentation and convert it for presenting live in a video call
- Use a previously recorded Prezi Video or a video draft
- Or create a video from scratch
To access the content (template + text and visuals added) of your previously recorded videos online, open your Prezi Video online dashboard. Click the dropdown in a thumbnail preview and select Video conferencing. This will open the video directly in the Prezi Video desktop app.
If you previously saved a draft project in the desktop app before recording your video, you can open it by clicking File >Open in the top toolbar.
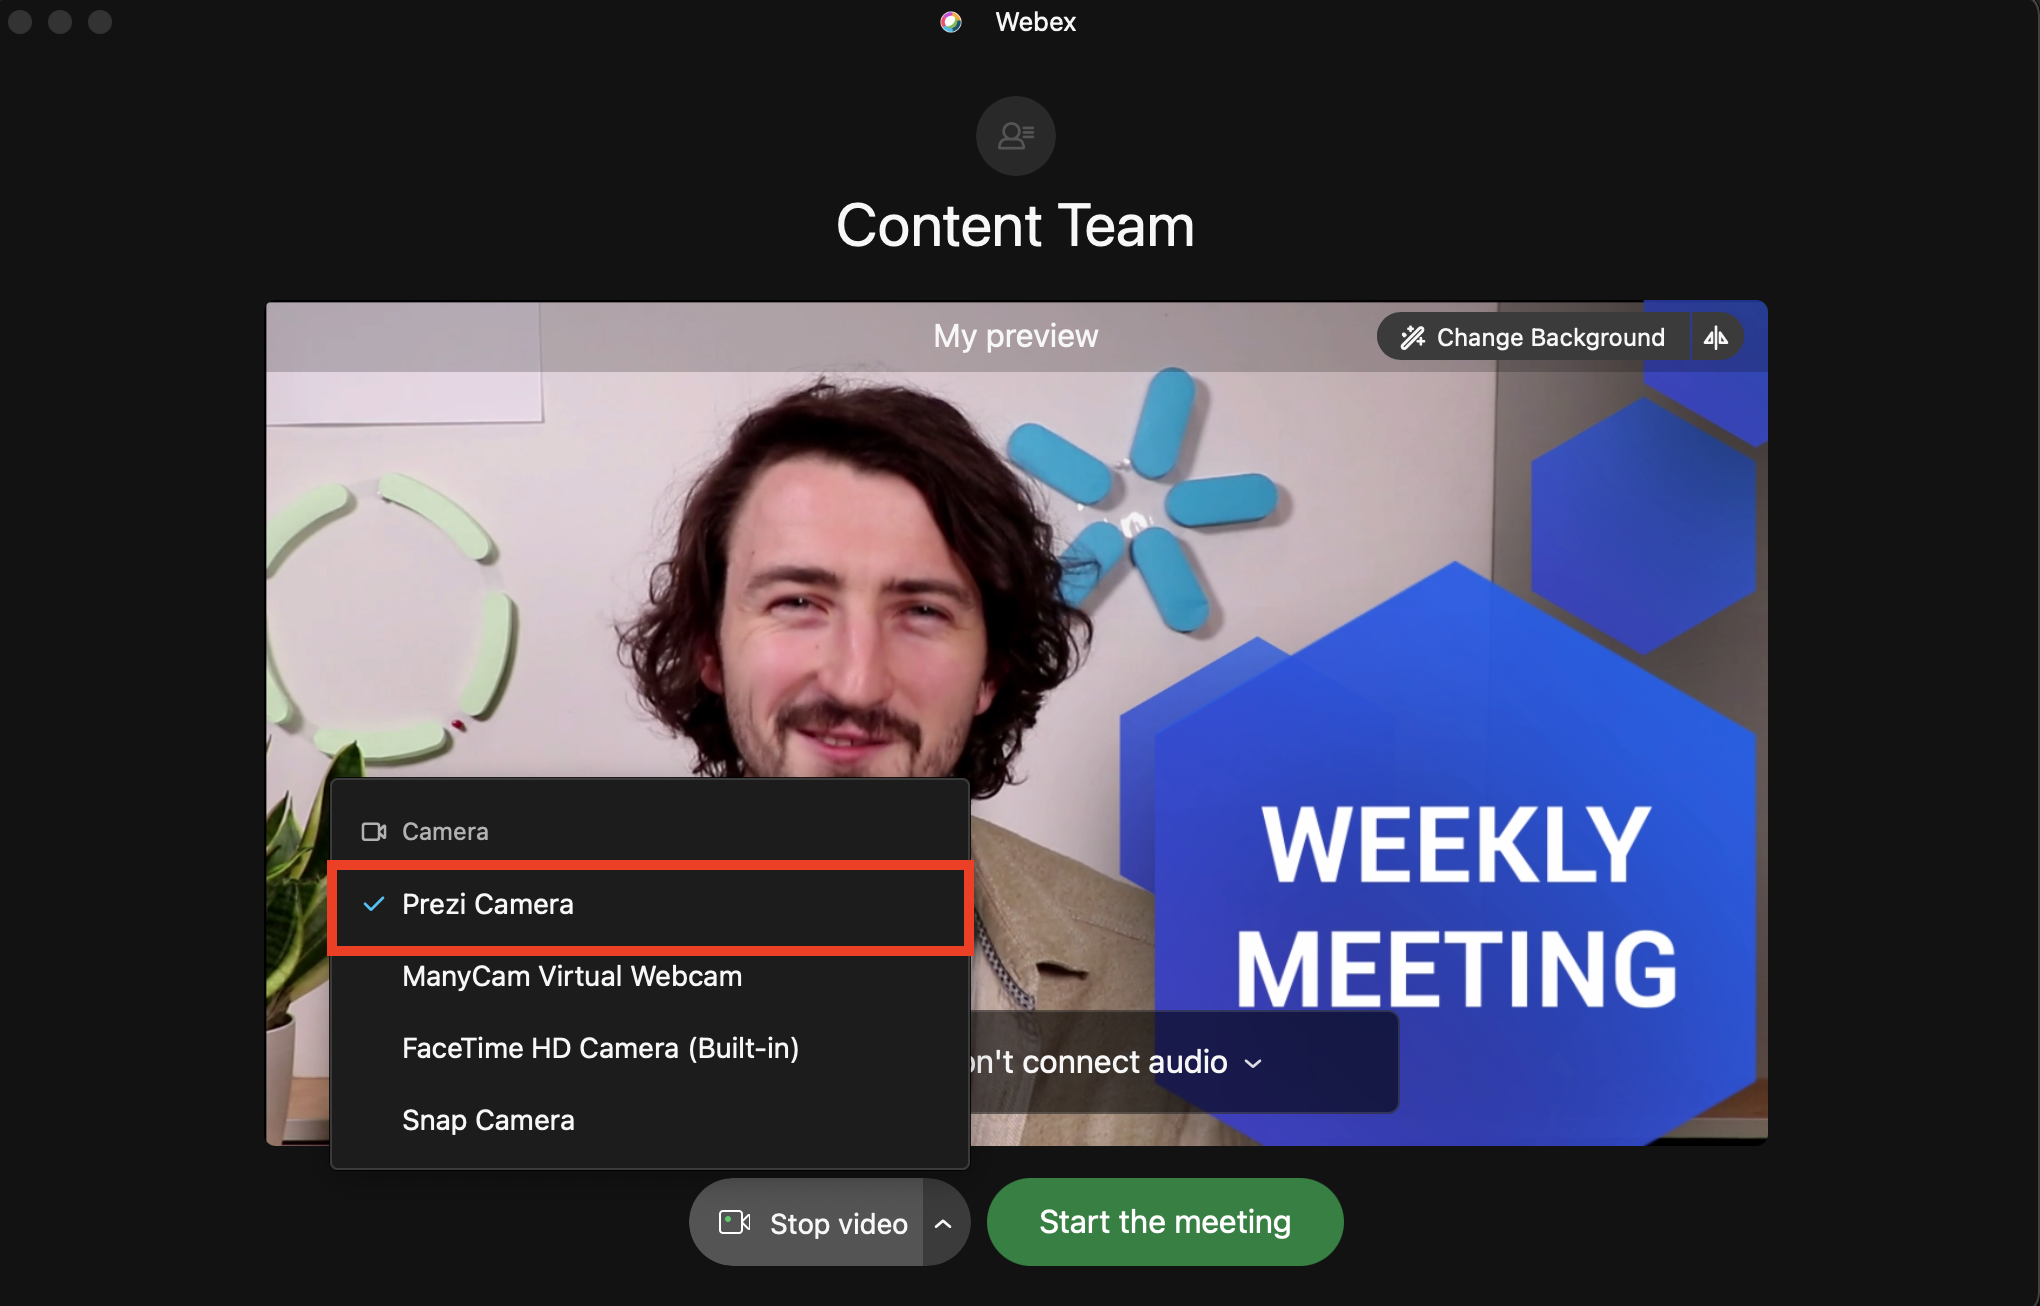
3. When you're done preparing your content, start your meeting in the Webex Meetings desktop or web app by clicking Meet. Then, click the arrow next to Stop video and select "Prezi Camera" from the camera list.
4. Click Start meeting and return to the Prezi Video desktop app. You'll see that the connection has been established at the bottom.
Before presenting, you can also hide the main panel of the app here:
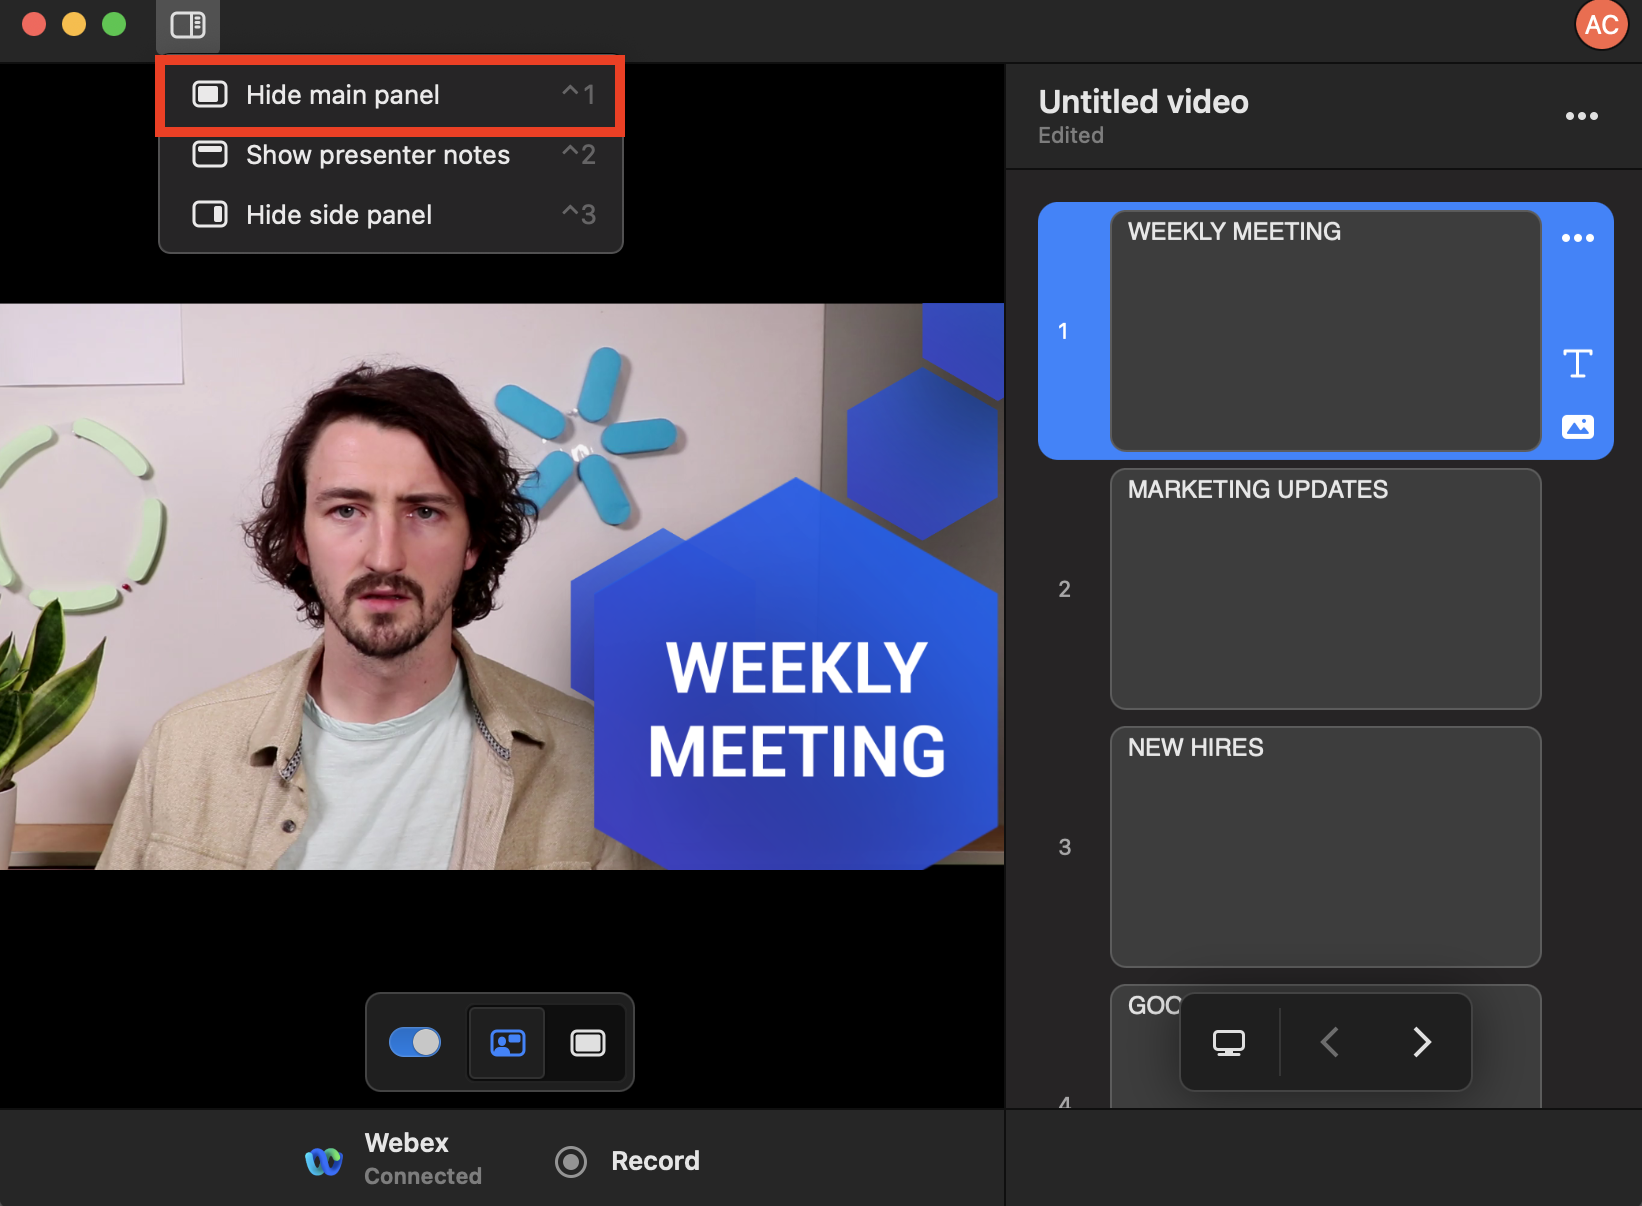
This way, you don’t need to have both Prezi Video and Webex open next to each other. You’ll still see the upcoming slides and the navigation arrows in the side panel. Your presenter notes will appear along the top, if you have any.
To navigate through your content, select the left and right arrows on your keyboard, in the side panel or click directly on anything you want to zoom to.
Depending on what you want your audience to focus on, use the toggle to either show or hide your content. When you’re showing your content, you can either make it appear right next to you or show it in full screen.

You can also share your screen while presenting or share live reactions while presenting. When you are done with presenting your video, just go back to the camera settings in Webex Meetings and switch back to the default webcam to stop streaming from the Prezi Video app.